
Tools of the Trade: Weather, Dark Sites & More
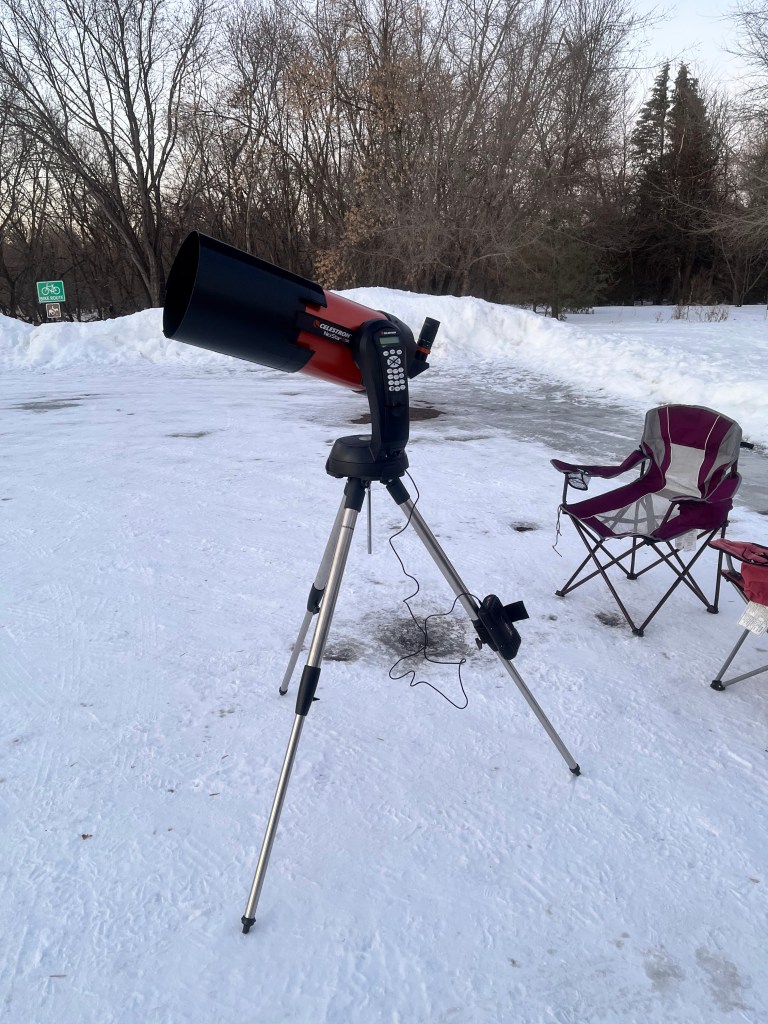
By the time my family unwrapped our (OK, my) brand new telescope last Christmas, I had been itching to put to use all the tips and tricks I’d learned for months in an actual night of observing.
The weather, as it so often does in South Dakota come January, had other ideas.
Is there anything as soul-crushing to an amateur astronomer as a stretch of vacation nights on the calendar and the cloudy, bright, soupy nights when winter clouds stretch in an unbroken dome overhead?
Well, maybe high winds and a thunderstorm. But we’ll save that for May.
At least I tried to be productive during the idle time my scope spent zipped tight in its case. I collected and bookmarked a series of websites and apps to help plan even the most spontaneous night of future observing. Which — let’s be honest — many are, due to the unpredictability of weather patterns and the need to trust your own eyeballing of a clear, steady night, even when the apps argue otherwise.
It also helps to have a go-to list of drivable sites at the ready. So I got that going, too.
Here’s a rundown on my toolkit for planning a night of stargazing.


Step 1: Finding that Perfect Night
In amateur astronomy, it’s often said that even more important than your telescope, or your eyepieces, or any other equipment is the quality of seeing on the night you choose to look through all those pricey accoutrements.
Seeing can mean the darkness of your skies — how far away you are from the unceasing glare of city lights, even the 150-watt obscenity of your neighbor’s motion-sensitive backyard spotlight.
Seeing can mean the transparency of the sky overhead — whether it is obscured by layers of clouds that are low, medium or even way high up in the atmosphere.
Seeing can mean other meteorological factors such as smoke from wildfires, fog, or wind, which on the upside could bring in clear air that has not contacted the ground (but could also cause your tripod to wobble so much everything’s a blur, anyway).
The goal is a still, clear night with very little cloud cover, at a spot where you’re not looking over neighbor’s roofs (where rising heat currents can also muddle the air you’re attempting to look through) or through thickets of trees. (More on selecting that spot shortly.)
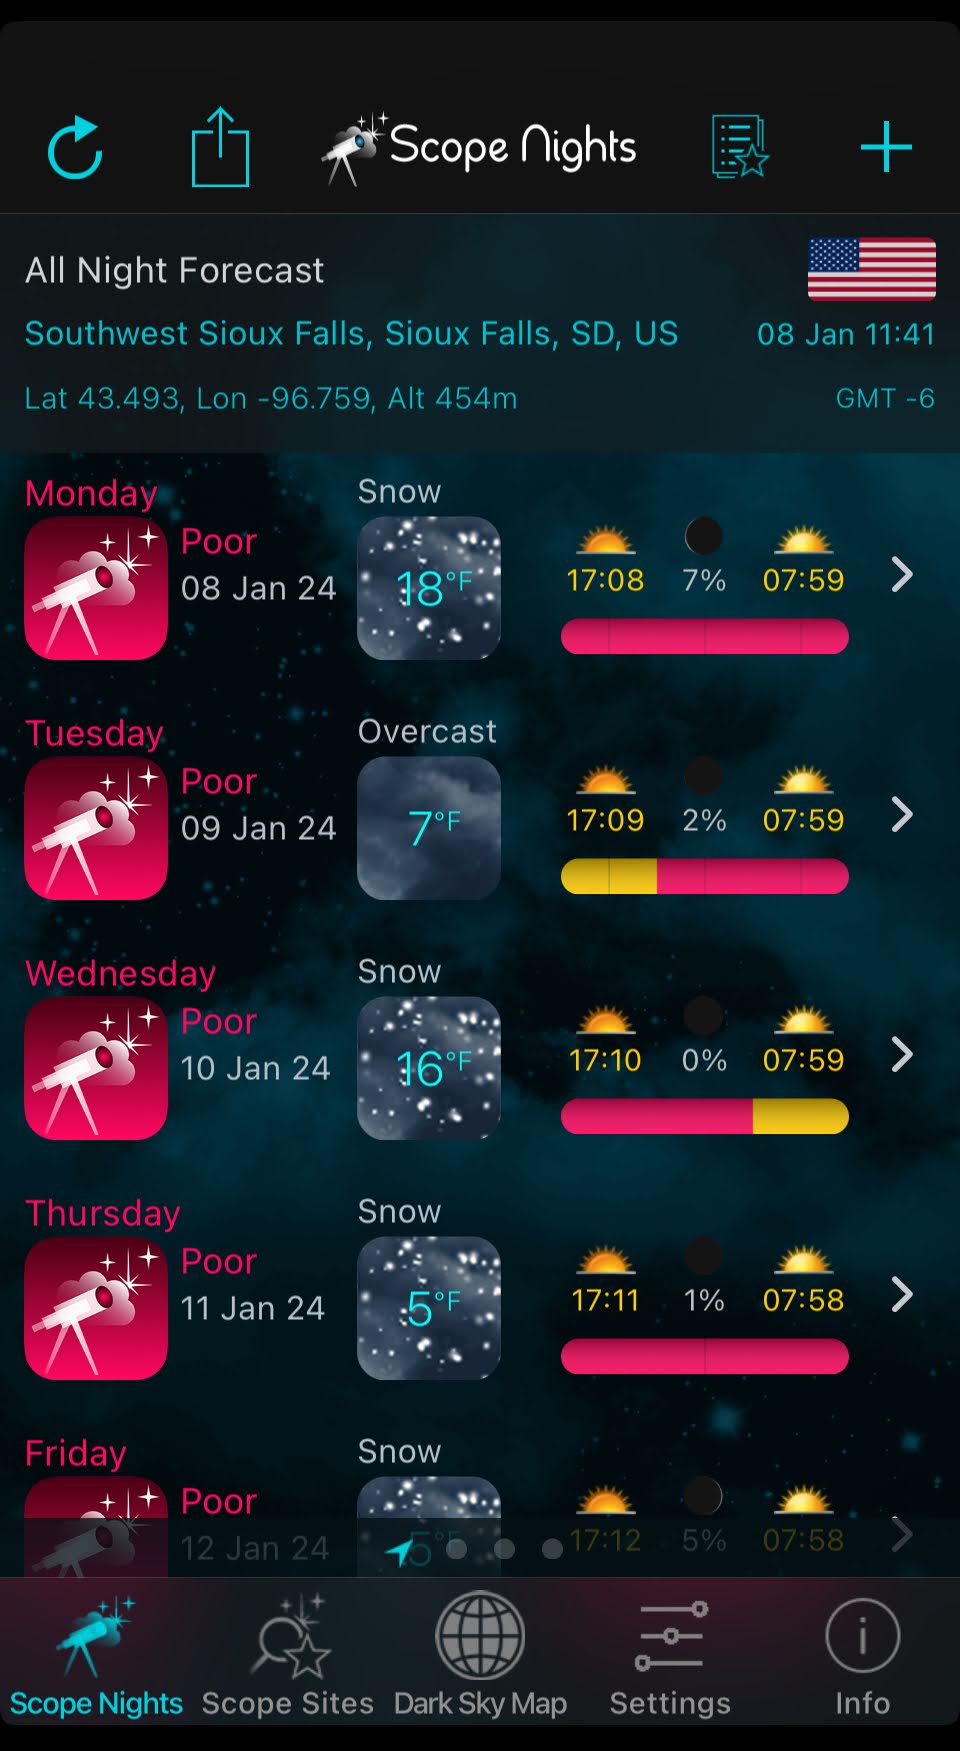
After a year of practice, the first place I consult when planning a night of stargazing — or knowing when to leave the scope at home — are the apps Scope Nights and Clear Outside. From my iPhone, throughout the day, I look up the weather at home or at any close or remote scope sight and check how it changes from hour to hour for key indicators like cloudiness and temperature and wind and precipitation. I may be looking at a rainless night, but the wind may be so gusty I’d never be able to get a still image as planets and stars jostle and blur.
These apps, for the most part, duplicate the experience in browser-based sites like ClearDarkSky, which lists weather data by location, globally; and the web-based version of ClearOutside, which is particularly helpful for its color-coded, hour-by-hour breakdown several days out and easy-to-read summaries of moon phase, moon rise/fall, and degrees of darkness, in addition to tracking the International Space Station and levels/degree of precipitation, wind, dewpoint and humidity.
You may not be able to see all the conditions align in your favor, but with enough of an overview of the predicted conditions, you can prepare for the night out — and where to make a go of it.
Step 2: Finding that Perfect Site
Realistically, you’re going to start by understanding what night you want to drag out all your gear and set to starting upward.
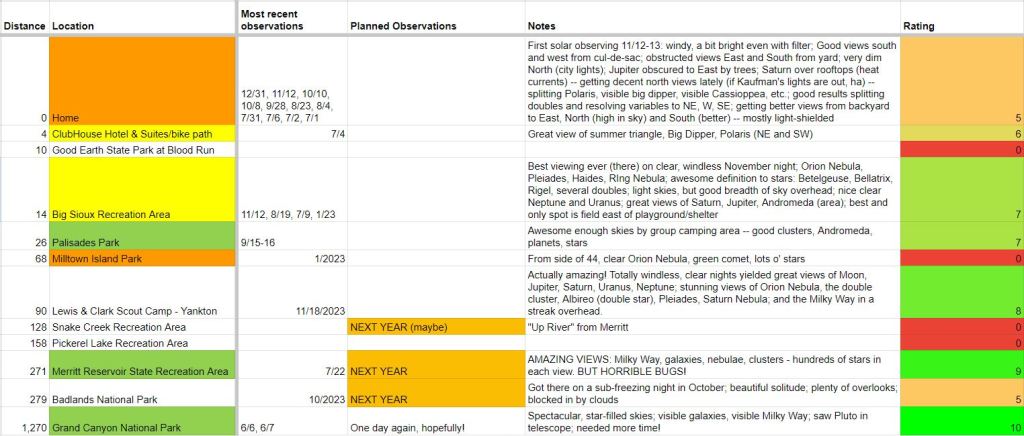
But once you’ve accumulated a stock of quality nights in quality sites, you will likely run down that list of places and check the weather conditions there before booking your next session.
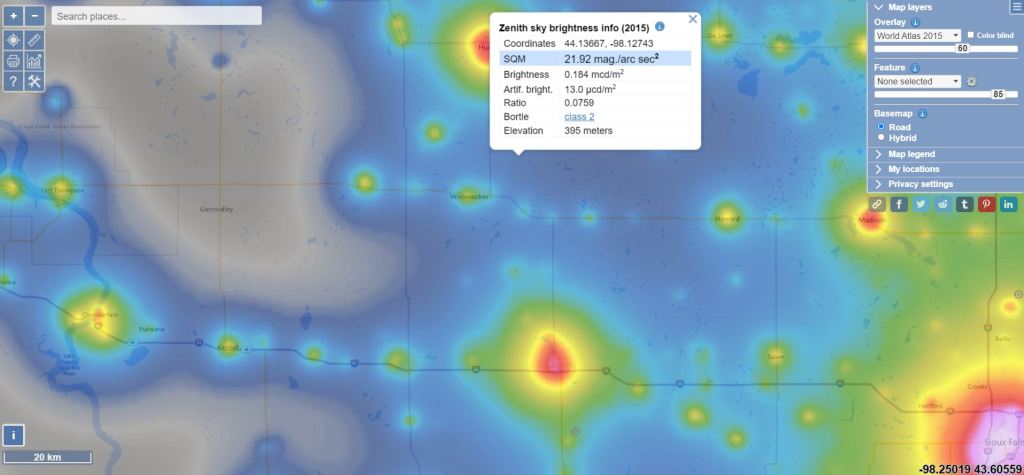
I started with my backyard, but quickly craved a spot away from the glare of the neighborhood lights. That took me to LightPollutionMap.info, where I could drop a pin on spots where the green and blue of the suburbs faded and the black and gray took over, and even check the handy reference to Bortle sky definitions.
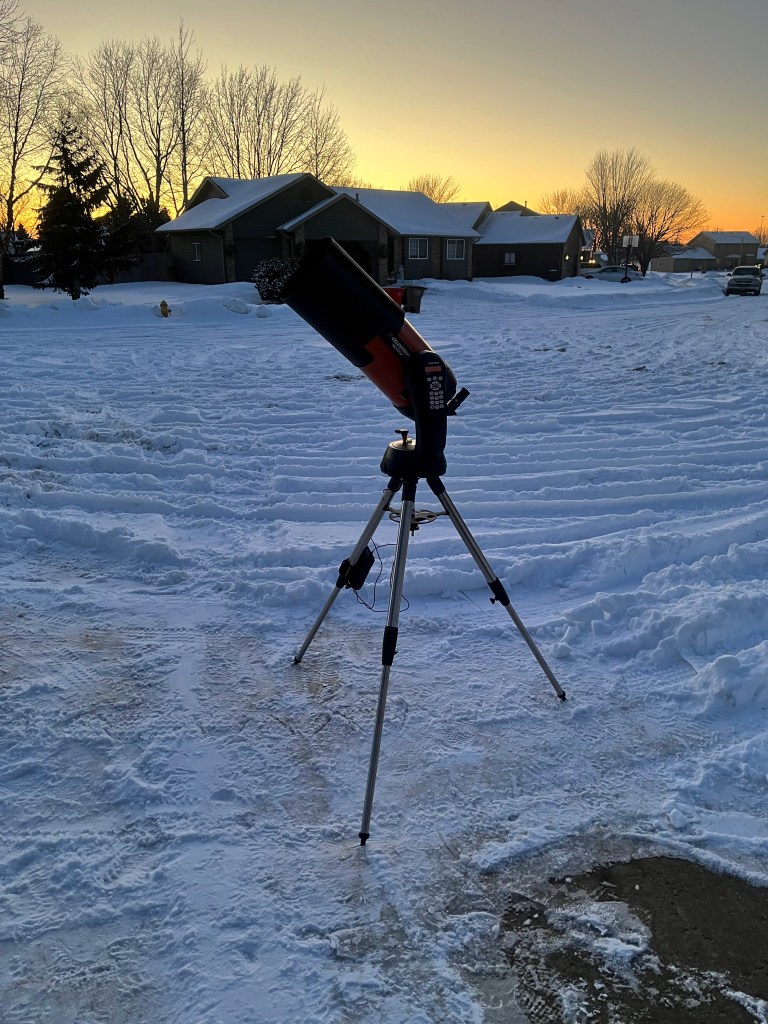
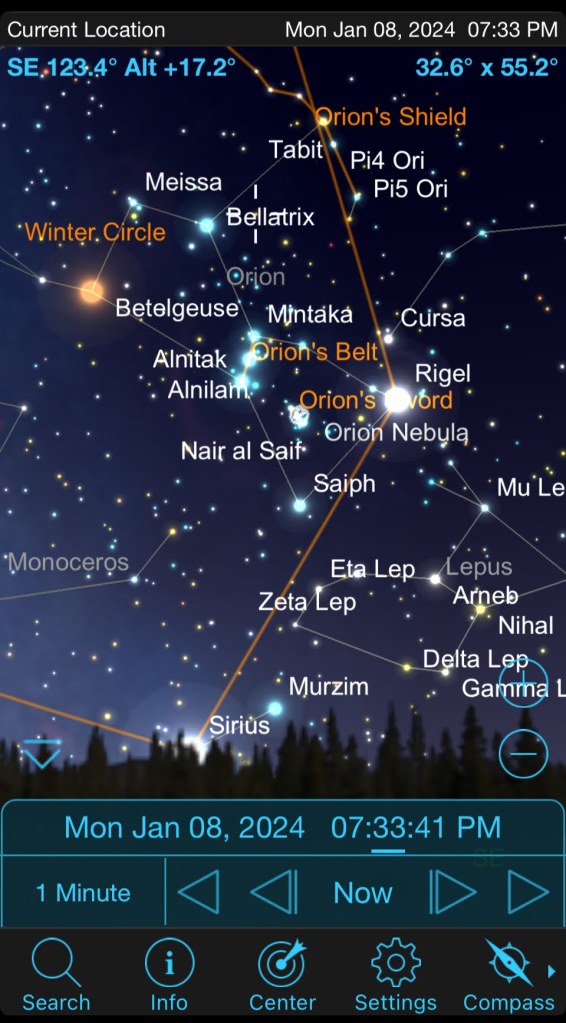
My first impatient foray, on a frigid night in February, had me chasing the setting sun a couple hours southwest of my city but with no actual, stable site to set up in. My oldest son and I eventually set up on the side of a rural highway and spotted last winter’s green comet and a few other first-time sites for me, like the Orion nebula, and Jupiter’s Galilean moons, but after a hectic pushing of the car from a snow-filled ditch, I vowed to get more organized next time.
That led me to planning overnights at South Dakota state parks and National parks, where if the forecast looked reliably clear enough, I could tote my pop-up tent (which I used to great effect during a blessed week in the Grand Canyon last June), and then survey the area I’d set up for late-night observing, using Celestron’s own SkyPortal app, with compass-feature enabled, to see where the starts would be throughout the night so i could pick the right window and the right area to set up the tripod, unobscured by trees, hills, etc.
Sure, I had to cancel a few times. And others, I was foiled early by mosquitoes or excessive dew. But I was building a stockpile of knowledge and notes I can go back to so I can make an efficient night of it on my second or third or fourth visit. There are just so many unknowns your first time out in a new place. But you have to work through them.
That’s the sweat equity that yields more time spent observing the wonders of the night sky, and less time lamenting the clouds closing in. Here’s to clear seeing, everyone!

Leave a comment