
 My first 1st-place Pinewood Derby car only took 35 years. Here is my son Ben’s “Screaming Cheese.”
Crafting a Winning Cub Scout Car: Dadding with Distinction
My first experience with the Cub Scout Pinewood Derby came in 1984. I was 7, and thus, brand new to the experience of sitting in my dad’s basement workshop in our 100-year-old-house, with the cobblestone floors and the blacked-out windows, investing hours in sanding, and resanding, and painting, and repainting, and sanding again, and painting again, and resetting the custom-drilled vice grip so we could get that fourth round of sanding and painting just right, and — are you sensing a pattern here?
I loved just about every minute of it.
Through the process of fashioning this block of pinewood into a lean, mean racing machine, under the tutelage of Dad, I was getting to know the value of process, of fashioning a thing the right way, step by step.
I was also getting an up-close glimpse at the peculiar meticulousness Dad brought to the thing. Something that, through the magic of genetics, basically begat my own exacting tendencies.
Consider that a bonus, I guess.
Well, long process short, my well-sanded, well-painted racer, come the big derby day, took home third place honors in best looking. I still have the plaque to prove it.
On the track, though, I was decidedly back of the pack.
The next year, Dad and I again were trendsetters, mid-1980s, with our VHS-tape-themed car. Like, w-w-w-w-w-wow, Max Headroom might have exclaimed. Were he utterly bored. Or, like, a d-d-d-digital c-c-c-cubmaster on the side.
Same result on the track, groovy VHS tape decals notwithstanding. We were pretty, but we weren’t very fast.
I mustered enough enthusiasm, my third and fourth years of Cub Scouts, to just race the VHS car again. Twice.
Thus ended my Cub Scout racing career.
But unlike the straight, roughly 3-second stretch that marks a Pinewood Derby car’s trek, the journey of life is long, and decidedly curved, like a good Grand Prix course. The Pinewood Derby wound back around and found me again, this time as a Dad, meticulous, process-driven nature fully in bloom, and a few boys of my own with which to continue the experiment.
COULD WE CRAFT A WINNING PINEWOOD DERBY CAR?
We’d have to taste failure a while, first.
 Thirty years after making my own Pinewood Derby car, I buckled up for another ride helping my oldest son, Jonah, with his.
If at First You Don’t Succeed… There’s Next Year
The most important quality for my oldest son, Jonah, in his first Pinewood Derby car was picking out the perfect pair of googly eyes.
This was 2014. 30 years after my first derby as a Cub Scout. The car blocks had changed, subtly. Gone was the big notch in the middle where a scale-size driver might have sat, experiencing the scale-size wind resistance such an un-aerodynamic design brought with it. (Not to mention the sheer terror of being strapped to a pinewood car with nail axles and plastic wheels with defining seams and bubbles down the middle from the ancient mold that pressed them into existence. Things weren’t all so hot back in the golden old days. But I digress.)
The kits still came with the same contents: a block, four nails, four black plastic wheels; instructions that specified the maximum length and width and weight: 5 ounces.
It would take us a while to understand how big a deal the weight rule was.
We showed up to the derby workshops our pack put on where, gratefully, I stepped back and let the Cubmaster and den leaders cut Jonah’s desired pattern with a jigsaw — not being all that mechanically inclined myself, beyond hanging pictures and pouring gasoline in the lawn mower. The pack provided sandpaper and paint, and we let the kids go at it. Which, really, is the point.
DISCLAIMER: It is longstanding Cub Scout tradition that, in point of fact, even though these are the kid’s cars, a considerable amount of Dad power and discipline goes into crafting them. We consider this OK, since, 20 to 30 years later, our boys (and girls, now — GIRL POWER!), all grown up, will be putting forth the same considerable Dad and Mom power to craft their own kids’ cars. END OF DISCLAIMER.
My first ohhhh reeeaaaaally? moment came as I watched two otherwise sane dads in our group enthusiastically cutting strips of sandpaper, dipping them in a tray of water, and running the wheel axle nails around and around in a power drill with the strips pressed against them. What on earth was this? And why on earth was this? To remove the burrs from the axles, I was told. Three tiny notches that Cub Scouting, in its craftiness, leaves etched into every set.
And why would we do this? I asked. To reduce friction. And, dear parents, to make sure your car is not, to be indelicate, crap.
Huh.
My education continued as I picked through the stack of other supplies the Pack brought out for our workshops: sets of body-fitting, screw-in weights for the underside of the car, and the woodworking chisels to carve out said space; plastic axle guards; wheel alignment jigs; wheel tuning mandrels; and tubes upon tubes upon tubes of dry graphite lubricant.
Double huh.
Setting aside my meticulous nature, inherited from my original derby Dad, a big part of my personality believes in avoiding overkill, wherever possible. And this being my first trek on the Dadside, guiding a car’s creation, I decided anything getting in the way of me affixing wheels to Jonah’s painted masterpiece (he was going for a fish look, in year one) and gluing on those coveted googly eyes was going to be set aside. I just wanted to make it to the track and across the finish line.
We did, with the usual results: back of the pack. Hey! Score one for carefree Dad-dom.
But repetition has a way of bringing out that latent meticulousness.
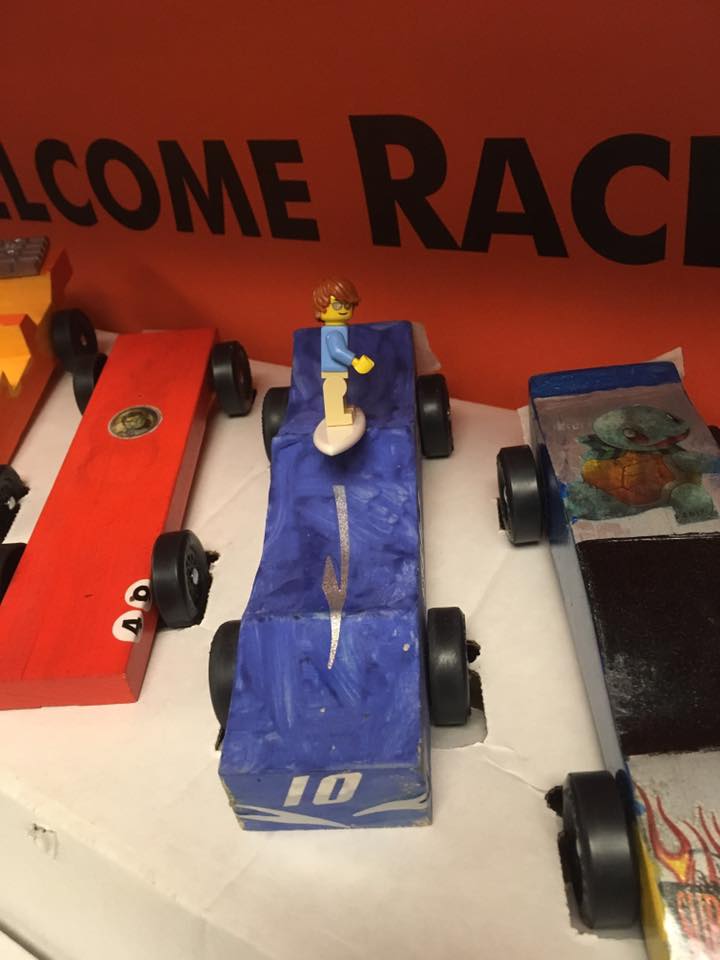 It was about the time Jonah and I turned in this carefree Lego Surferdude Pinewood Derby car – and had to start it backwards on the track, sans guy — that I began to see the value in understanding Pinewood car mechanics. But what a blissful last carefree entry.
Thirty-Four Years of Being Average
2014, 2015, 2016, 2017…
Four years in to my career as derby Dad, my track record was solid, if unspectacular.
I considered it a major achievement if, when it came time to finally tap the wheels onto Jonah’s, and now Ben’s, pinewood cars, I didn’t accidentally smash the front and back ends of the car to bits or render the wheel completely immobile.
There were some years, up the night before, finishing the cars at the 11th hour, the only thing holding the wheels to the car were the plastic axle covers and a father’s fervent prayer.
I spent so much time carving the undersides, adding weight, and never quite making it to 5 ounces (first derby hint: you want to be right on 5 ounces), that just making it to race day and abandoning the experiment to the Cubmaster to send down the track was sweet relief.
Then a funny thing happened to this Eagle Scout who locked down that major award two days before he turned 18 (two days before the absolute limit for earning your Eagle scout award): I raised my hand and became, first, assistant Cubmaster, and then, Cubmaster.
Cue meticulous tendencies.
It was during the 2017 race, while I was running the Derby software and announcing the cars running down our slick, new metal track, heat by heat, that I began to think about putting a bit more effort into derby car prep to go with prayer. (Always, always pray.)
Jonah’s entry that year was delightful, and probably emblematic of our carefree approach to the race so far. He drew a wavy line on a block of wood, we watched it get buzzed out, and he painted it blue, making a wave fit for a Lego surfer dude. About my biggest innovation, that year, was gluing the Lego figure stand to the block, so the dude could hop on and off.
This proved to be fortuitous since, going by the rules, our little Lego guy was far too tall to ride down the track. And as it turned out, Jonah’s wave car was so blocky on one and pointy on another that the only way it could actually make it down the track was to ride backwards. Maybe cool for hanging 10, but decidedly too chill to make any dent in the top times.
Next year would be different.
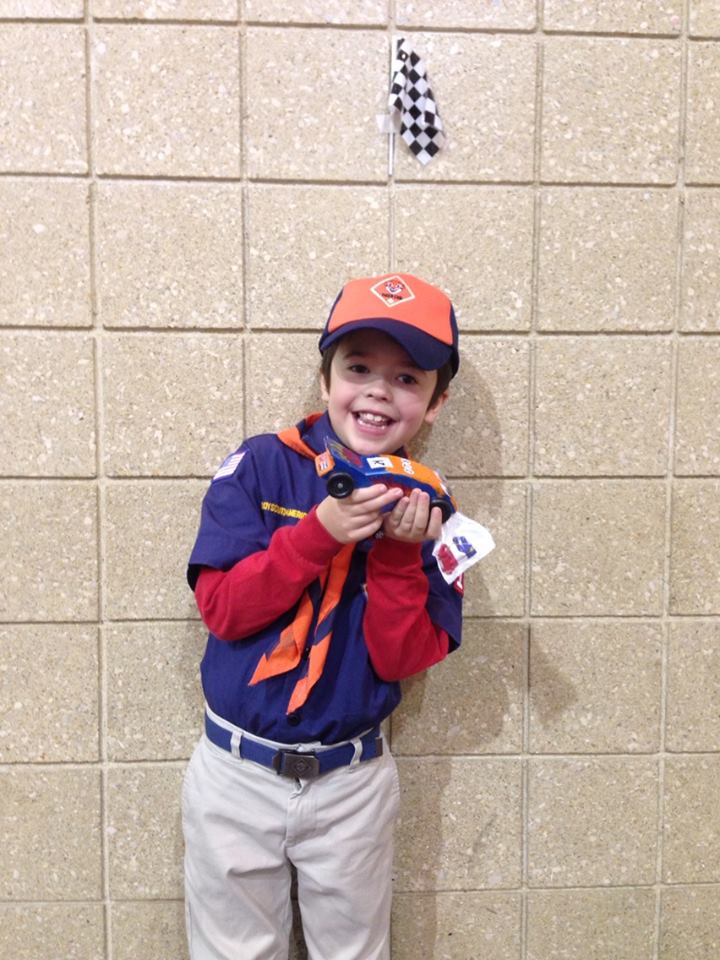
 Ben proudly holds up his Screaming Cheese car from 2019, which won our Pack’s derby and screamed its way through regionals.
Recipe for Derby Success? I Guess
2018’s derby rolled around and, suddenly, I had just one car to focus on, Jonah having graduated from the ranks of racing Cub Scouts and crossed over into Scouts BSA.
Maybe it was the extra time in having just one car to reliably push across the finish line. Maybe it was luck. Probably it was luck. But Ben’s derby racer — designed and painted by Ben, but given a thorough, meticulous if you will, prep to make exactly the limit 5 ounces in weight, and liberally dusted with graphite lubricant in the wheels right up to the race, stunned this Cub Scout dad and finished third.
Wha, wha ha-ha-happened?
This stoked the competitive fire in Ben and the next year he announced, merely, that he wanted to do everything we could to win. Which meant meticulous Dad dug in for research.
These days, that means YOUTUBE. With a big assist, as well, from Boys’ Life and some of the published guides.
You can easily drive down the rabbit hole, so to speak, watching grown men clamp drills onto workbenches and turn wheels against sandpaper, then run said wheels down a properly leveled board, then shake said wheels in ZipLoc bags filled with graphite. Heck, I encourage it!
But when it’s all said and done, here are the guides and the tips that I have followed the last two years, to consistent success.
Boys’ Life Overall Tips — https://boyslife.org/hobbies-projects/projects/2952/speed-secrets/comment-page-2/
The Best Video that Sums Everything Up — https://boyslife.org/hobbies-projects/projects/138909/use-science-to-make-a-fast-pinewood-derby-car/
Published Book — Pinewood Derby Speed Secrets
Published Book — Pinewood Derby Designs & Patterns
By far the most important tip I try to follow is to make sure the car weighs 5 ounces, and to put that weight roughly over the back wheel. The video explains how that’s consistent with the laws of physics, which are really what is powering your gravity-driven car as it starts high up on a track and ends at the bottom of a long, long straight stretch. Putting the weight in the back enables your car to get more push-ahead force on that straight, whereas cars with the weight in the front expend all that energy just as they hit the beginning of the stretch.
Anyway, the video explains it better than I can.
But here, in order, are the tips I follow. Sorry, no pictures — I’m still a devout amateur dad here and way too focused on not hammering the car to bits to capture every step visually.
1. Cut an aerodynamic design. Here is where parents can advise, but your son or daughter can pick a cool wedge or aerodynamic shape, draw it on the block, then turn it over to you to cut with the scrollsaw or jigsaw. This does not have to be fancy. The doorstop shape seems to be most “cut out” to win each year. But the blocks, the buses, the pencils, Ben’s hot dog, from 2017 — they are limited in how they move through the air and the air moves over them.
2. Bake your wood block. Boys’ Life advises 2 hours at 250 degrees. This sucks the moisture from the car and takes the weight down even more, so you can replace that weight where you want it (toward the back of the car). Pro tip: you’re going to want to paint it soon after so the moisture can’t get back in. Before that, sand it smooth with varying grades of sandpaper — start about 110, work your way up through 200, 400, 600, even 1,000 if you’re so inclined. Buff out the pointy bits.
3. Before painting, add weight toward the back. Weigh your car on a postal scale. It will be a lot less than 5 ounces. This year, after baking, my cars were 1.7 and 1.6 ounces, respectively. Wheels and axles will be about .5 ounces, altogether, not counting wheel guards (if you use them — my most winning cars have not). So you want to get your car up to about 4.5 ounces, maybe 4.4 (paint is going to add weight to the car). There are great screw-on body weights, that typically require you to carve some material way from the underbody, but you can put them wherever, doesn’t have to be pretty. Lately, I’ve wanted the cars pretty and fast, so the best product I’ve found are tungsten discs — you take a 3/8 inch drill bit and drill into the side of your car, or the back, wherever there is a good section of wood, then slip them in and cover over the holes with wood putty, which you can sand down smooth and paint over. See? Pretty and fast! You don’t want the weight all in the back, because that could cause your front to ride up and slow down the car. Experts say the best place for the weight is within 1 inch in front of the rear axle.
4. Several coats of paint This doesn’t add speed, but it does a lot for the prettiness and pride factor. I switched from acrylic (soap and water washable) to enamel model paints last year (need something oil-based or mineral spirits to clean up), and I added spray-painted clear coat to both make all the stickers and designs permanently stuck and give the cars a glow. That was such a hit, that this year I constructed the type of cardboard box painting booth they lay out in the Derby Designs book and first sprayed a few layers of primer, sanded it, then a few layers of glossy enamel paint, then sanded it, added decals and finished with a couple coats of clear coat. The book suggests not mixing different brands of paint, to avoid bad chemical reactions. Krylon is readily available, and Testers, and like a few products in life today, it seems the same brands own everything, but I’d still try to match it as closely as you can. I also tape over the axle holes and grooves on the underside of the car, since I don’t want any paint causing friction on the wheels.
5. Polishing axles — Yes, I turned into one of those nutty dads cutting strips of sandpaper, dipping them in water, and sanding the axles. But I got much, much better at it. I start with a triangular metal file and go after the burrs under the nail head first, then take off the three burrs on the body. Then I use varying grades of sandpaper — 110, 220 — and finish with a polishing compound on a strip of feltlike cloth. The Speedworks kits come with the stuff. It smells suspiciously like toothpaste, though, so feel free to consult all the videos out there. You send up with smooth, shiny axles that are going to give minimal friction to the wheels spinning on them. OUTTASIGHT!
6. Preparing Wheels — Multiple steps here. I use sandpaper — 110, 220, 600 — over a sanding block, dampened with water so the wheels don’t burn, and put said wheels on a wheel mandrel to polish on the paper. They end up looking gray and scratchy at first, but if you turn them on low speed, and keep turning them, they end up being very, very, very smooth. And fast. Which is what we want! I then take the polishing compound and put a pea-sized blot of it on a 1-inch snip of pipe cleaner, fixed in a drill. I run the drill on high speed for just 20 seconds of so, polishing the center of the wheel, through which the nail axle goes.
7. Applying Graphite, Part 1 — After prepping the wheels above, I put them back on the mandrel, then squirt a nickel-sized dollop of dry graphite on an old Tshirt. I turn the wheel through the graphite on medium to low speed and get it polished up to a shine.
8. Putting on the wheels — At this point, you can weigh everything again, wheels off, and see how close you are to 5.0 ounces. I try to keep things to 4.9, since scales can vary. I highly suggest using the Pinewood Derby axle guides and drill bit so you have straight axles and big enough holes to just use finger power — instead of a hammer — to push them in. I usually do this, now, before painting since I hang the car in my paint booth by the axle nails, twisting light-gauge wire around it. With those holes ready, I take some more graphite and send a little poof from the tube o’ lube into the wheel hole before putting the nail through. IMPORTANT: I use around 2 or three business cards to put against the car body and underneath the wheel before pushing the nail in so there’s just a couple hairs (a couple business cards, really) distance between the wheel and the car body. You don’t want it too loose, but you also don’t want the wheel flush with the car — that’s friction, and that will grind your car to a halt. BE VERY CAREFUL ATTACHING YOUR WHEELS — to have come this far, and have issues, or to take a hammer and bash things to heck, is just heartbreaking. FINGER POWER!
9. Applying Graphite, Parts 2 and 3 — Parts 3 and 4, I guess, if you added it to the wheel bores above. Now that the wheels are on the car, I hold the car over the sink and squirt lube right under the nail head. If you’ve left that hair or two of space recommended above, the wheel should lie flat against the body and the nail head stick up enough to work graphite in. Other tips suggest using a paintbrush. Whatever you do, you want to lube each wheel and turn it several times, working the lube in. You should do this the day of the race as well, but the main thing is rolling the wheels to get the lube worked in. You may notice your car get faster and faster the more it races — DON’T SAVE THAT SPEED FOR AFTER THE RACE ENDS. Work the wheels before enough so that each wheel can run for about 30 seconds before stopping. That is a well-lubed wheel.
10. On rail riding, bent nails, three wheels, etc. — The video above will go into some of these strategies, which aren’t always legal. I would say, most years, I accidentally nailed the wheels in haphazardly enough that three wheels were down on the surface and one was up. It didn’t give me that much of an (accidental) advantage, if it helped me at all. And in some derbies these techniques are not strictly legal. You will want to check with your pack. And I find the weight, the shape, the prepping of axles and wheels, and the lube goes a long, long way.
11. HAVE FUN — Just seeing my boys be able to celebrate a trophy or two was fun. But that wasn’t the main fun. It was the experience of designing and working on the cars with them. Of teaching the value of process. Of seeing them enjoy the designs coming to life each year and watching them race. That’s the real thing to emphasize. NOT the winning.
Though, I guess, if you’re spending 36 years on derby cars, more or less, like I have, it helps to show some improvement.
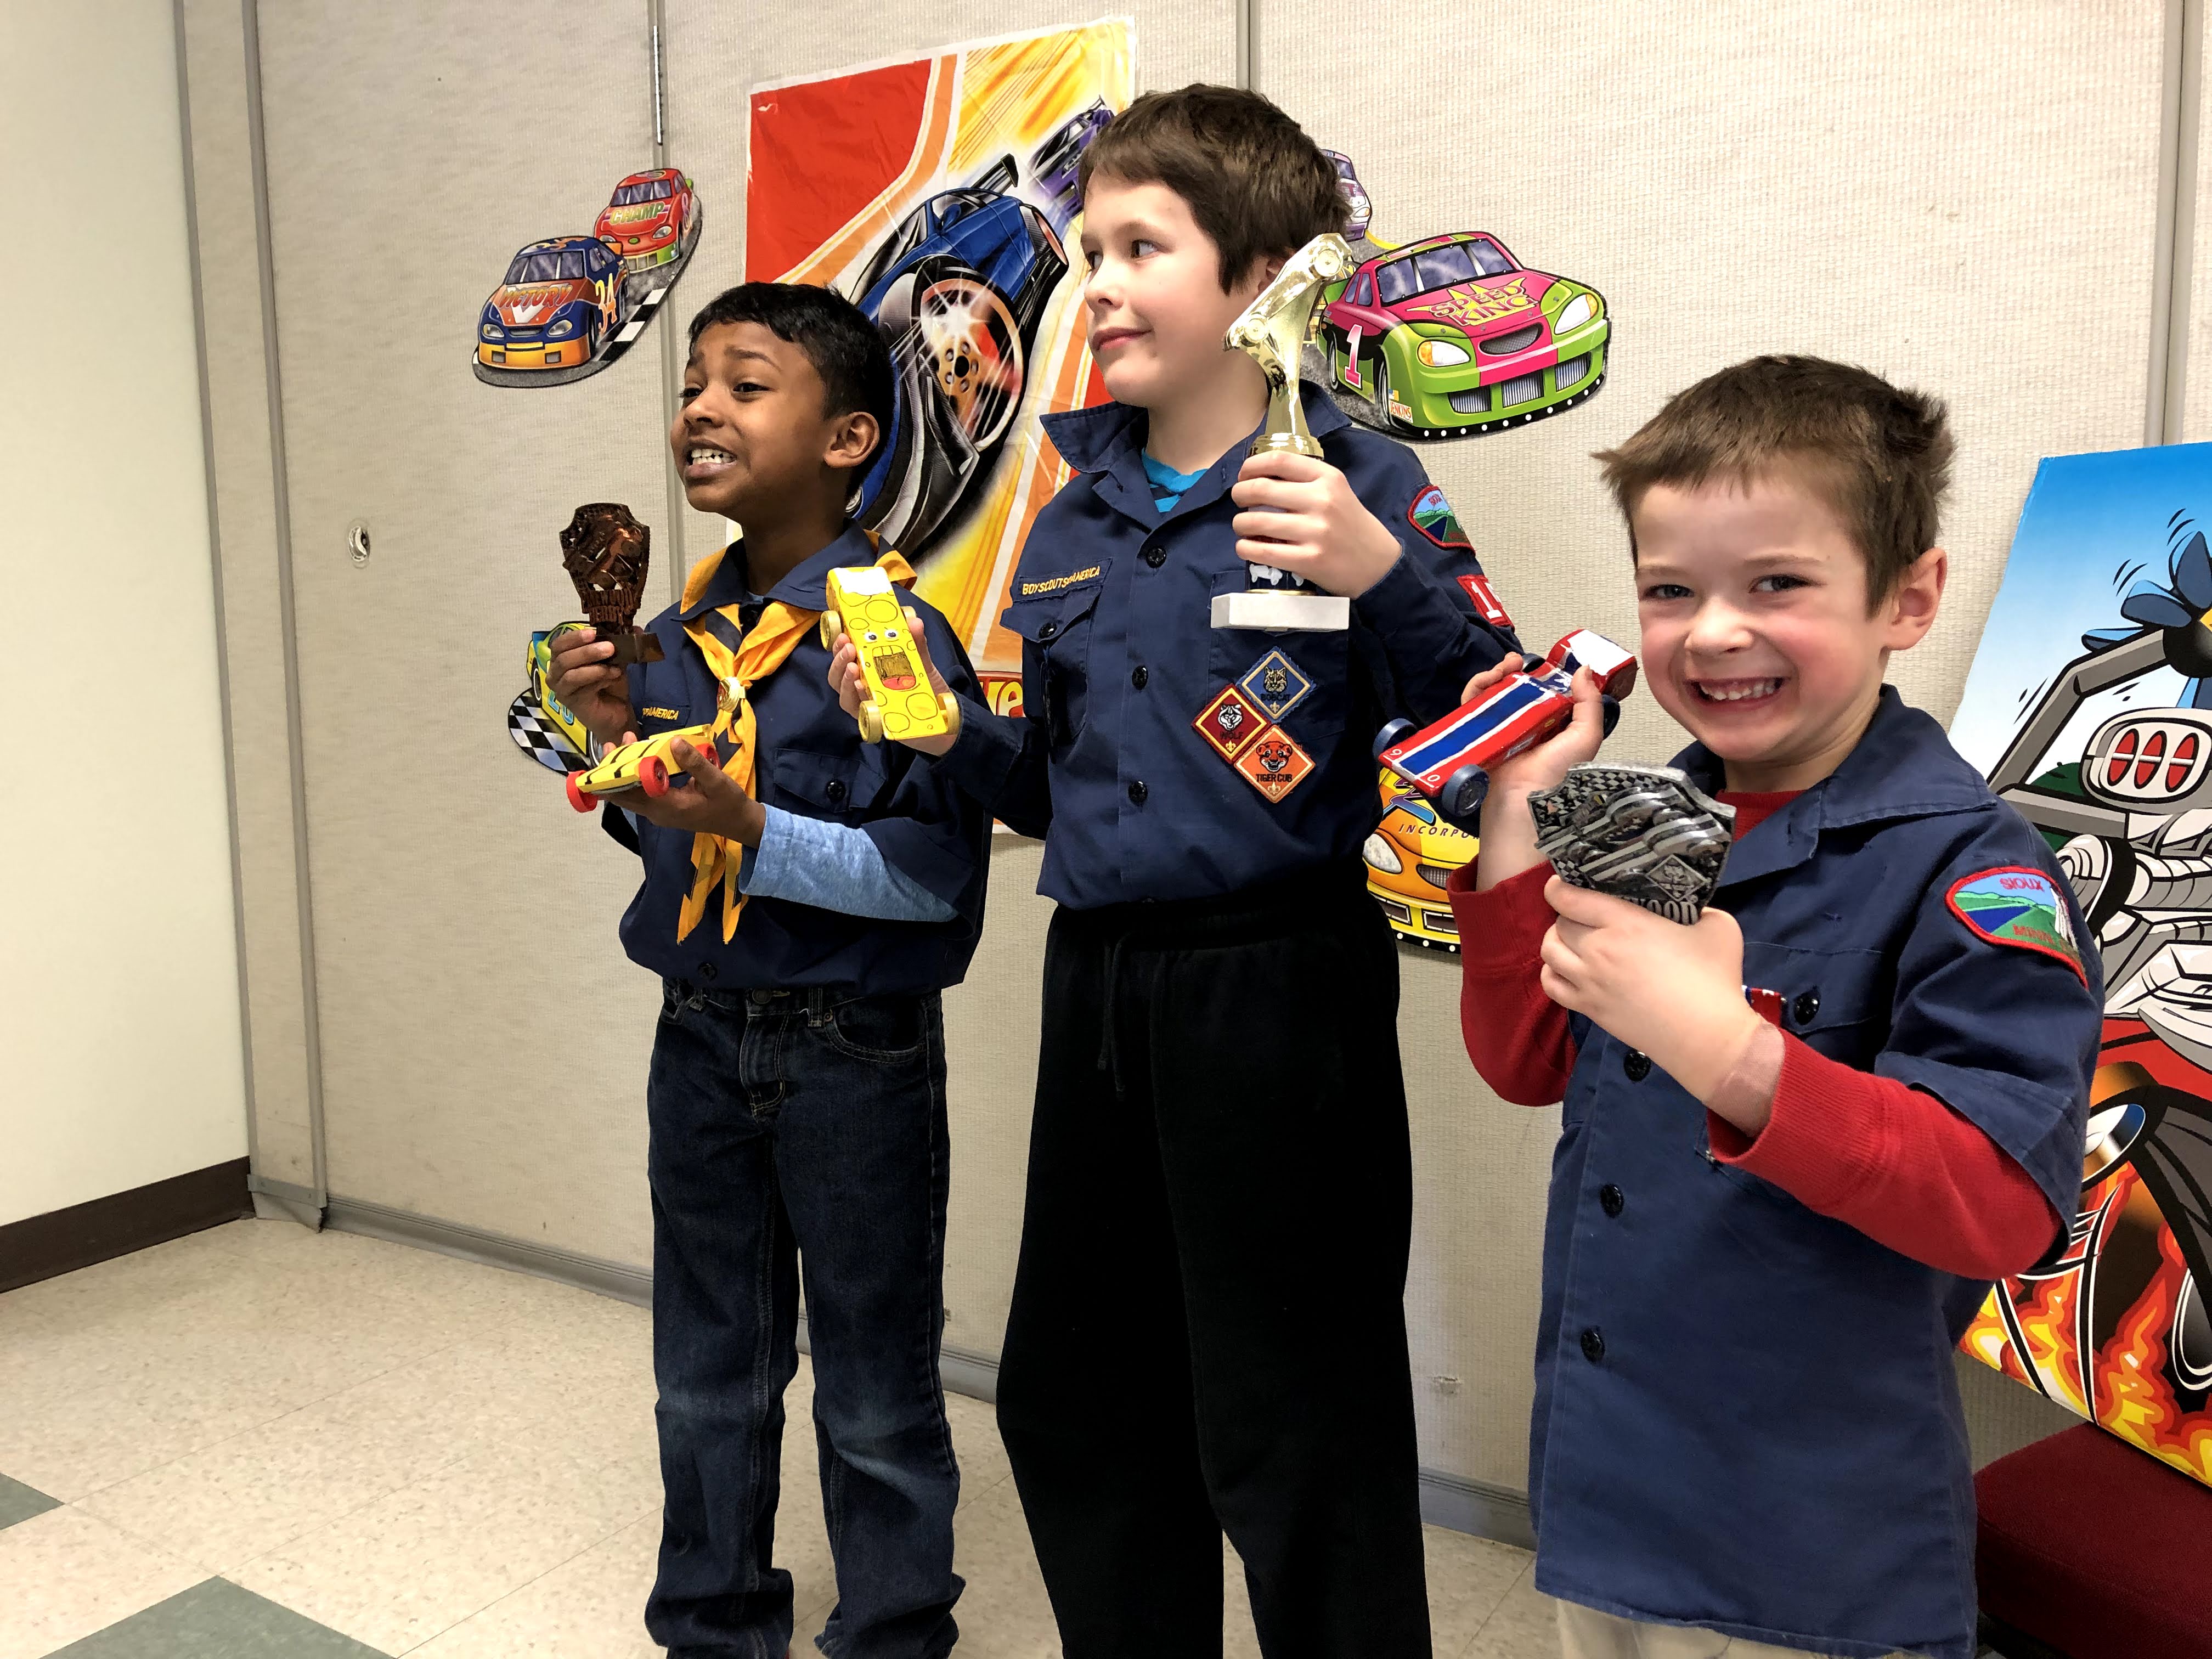 Cub Scouts Ben Foutz, center, and Caleb Foutz, right, celebrate their first- and second-place finishes in the Pack 155 Pinewood Derby.
Winning isn’t in the Scout Law; Kindness Is
In 2018, Ben had his breakthrough third-place finish.
In 2019, Ben finished first, and my youngest son, Caleb, debuted at 2nd place.
This year, Caleb notched another second-place finish, separated from the 1st-place car by just .11 of a second over eight races. As in, cumulative. Tough competition, eh?
Ben’s Screaming Cheese from 2019 still took the Old Guy Division, Ben having crossed over into Boy Scouts now — it was still the fastest on the track!
Caleb, used to victory, actually said, “I already have one of these!” when getting the second-place trophy. So, we still have some things to learn — about Kindness, and humility.
But there is a next frontier for Derby Dominance — we still finish middle of the pack against the blazing fast cars at regionals.
Hey, I’ve got to keep myself occupied, the next 36 years.
